The world of generative AI moves at a relentless pace. Just when you’ve perfected your workflow, a new challenger enters the ring, promising revolutionary results and demanding your attention. This week, that challenger was Qwen-Image, a massive 20-billion parameter model from Alibaba that landed with bold claims of perfect text and unparalleled detail. But as with any new, powerful technology, the journey from installation to a flawless image is never a straight line. It’s a path filled with cryptic errors, unexpected incompatibilities, and a whole lot of trial-and-error. This is the story of that journey, and my guide to taming this powerful new beast.
The First Encounter
The first hiccup I ran into was that Qwen requires transformers>=4.51.3 while diffsynth required transformers 4.46.2. This caused an issue since you can’t have two versions of transformers in the same enviroment, and I stubbornly refused to make a separate enviroment for QWEN.
Some additional research lead me to diffsynth engine, which seems to work as an alternative to the diffsynt library. Once this dependency issue was resolved, it was time to fire up ComfyUI and get on with the testing.
The Cold Start

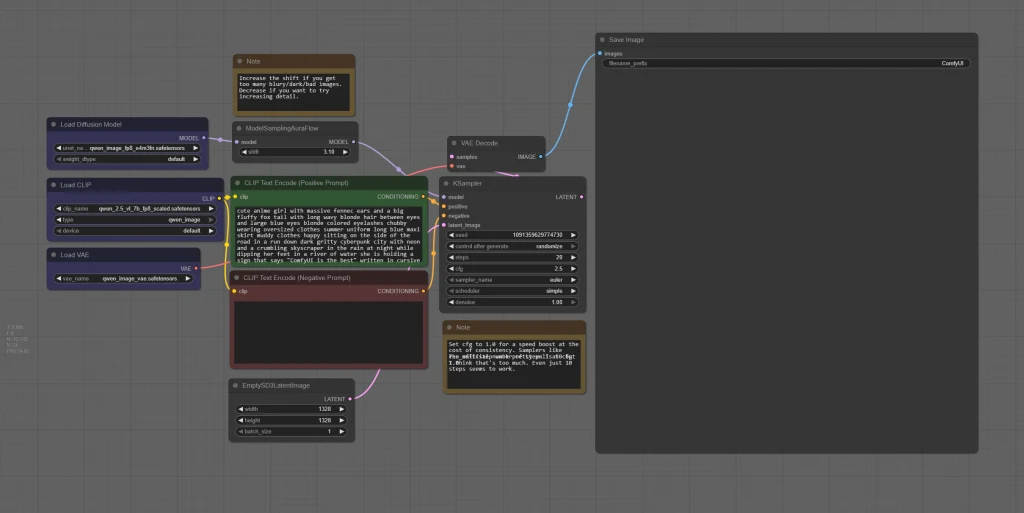
Following the official instructions, I loaded up the model, used the recommended settings, and hit ‘Generate.’ The result was… not quite what I was hoping for.


These are the first images I created, using the pre-defined settings in the workflow.
On the left, we have a beautiful rendition of ‘Cosmic Static,’ and on the right, a profound artistic statement on ‘The Emptiness of the Digital Void.’ Neither, however, was what the prompt asked for. This is a classic symptom of a new, powerful model that hasn’t been properly configured. The engine was running, but the steering wheel wasn’t connected yet.
After getting these beautiful but utterly useless initial results, it became clear that the problem wasn’t just the sampler settings. There was something much deeper going on. My initial attempts to generate anything at all were met with a wall of silence or, worse, a flood of cryptic error messages.
This began a deep dive into the very core of how ComfyUI handles these new, advanced models.
The Attention Mechanism Gauntlet
The first major roadblock was the attention mechanism—the part of the engine that allows the model to ‘focus’ on different parts of the prompt. My standard, high-performance startup configurations were failing spectacularly.
Sage Attention: My first attempt using the older –use-sage-attention flag failed completely, and is what caused the Cosmic Static and Digital Void images above.
Flash Attention: My next attempt was with the industry-standard –use-flash-attention. This seemed promising, but resulted in a massive wall of red error text, with the system complaining about a low-level PyTorch bug. The only reason I got an image at all was because ComfyUI was smart enough to gracefully fall back to a slower, default engine. This was a critical clue: the high-performance option was fundamentally incompatible.

The first real image with QWEN, and while it looks okay at first glace when you look closer you will notice thin, half invisible vertical lines, which I call thin paper artefacts.
After extensive testing, I finally found the solution to the startup crashes. It turns out that Qwen-Image is, at present, fundamentally incompatible with the most common high-performance attention libraries like Flash Attention and Sage Attention.
This leaves us with two stable options:
- The Brute Force Method: As some in the community have discovered, you can uninstall all custom attention libraries (xformers, flash-attn, sage-attention). This will force ComfyUI to fall back to its slowest but most reliable engine, the default PyTorch Scaled Dot-Product Attention (SDPA). The model will run, but you sacrifice all performance optimizations for your other workflows.
- The Elegant Solution: A much better approach is to simply let ComfyUI default to using the xformers library. My tests confirmed that xformers is fully compatible with Qwen’s architecture, providing both perfect stability and a significant performance boost over the base SDPA.
Beyond Stability: The Hunt for Perfect Quality
Even after resolving dependency and compability issues, I felt that the images (while clear and accurate) was kind of bleak. In my tests I took images that I had previously created with Flux and used the same prompt to replicate with QWEN.


I was left with the following:
- Solve the thin paper artefacts
- Understand the QWEN prompt structure
- Examine bleak coloring
- Optimize workflow
The VAE Transplant
My hypothesis was that the default VAE was the source of the “Digital Paper Grain.” My first step wasn’t to search for random alternatives, but to go straight to the source: the model’s own configuration files.
By examining the config.json for the Qwen VAE, I found the architectural blueprint I was looking for. The key parameter was “z_dim”: 16. This ‘z_dim’ (latent dimension) is the fundamental ‘shape’ of the internal canvas the AI paints on.
This was the smoking gun. I knew from my deep dives into the WAN video models that they are also built on a modern architecture with an identical z_dim of 16. This confirmed they were designed to be compatible at a fundamental level. They weren’t just similar; they were speaking the exact same technical language.
This gave me the confidence to perform the transplant. I swapped the default Qwen VAE with the high-quality, full-precision Wan2_1_VAE_fp32.safetensors. The results were immediate and conclusive: the paper grain artifact was completely eliminated, proving that a deep dive into the model’s own schematics is the fastest path to a solution.
Ultimate Qwen Protocol: A Visual Guide to Optimization
With the core stability and quality issues solved, the final step was to build a complete, optimized protocol. This involved a series of controlled A/B tests to isolate the impact of each major component in the workflow. The results were fascinating, revealing that we have a suite of powerful ‘dials’ to control not just the quality, but the entire artistic soul of the final image. Below is the visual evidence from my digital darkroom.


The Key Takeaways:
As the images above demonstrate, we have four primary levers to pull in our Qwen engine:
- The Core Optimizations (fp16 accumulation + dynamic shift): These are our non-negotiable baseline for quality. Enabling them provides a noticeable boost in detail, stability, and compositional coherence across the board.
- The VAE (The “Cinematographer”): This is our main control for the final aesthetic.
- The bf16 VAE delivers a sharp, graphic, high-contrast “studio photography” look.
- The fp32 VAE delivers a soft, atmospheric, and painterly “arthouse film” look.
- The CLIP Model (The “Creative Director”): This is our control for the core concept.
- The fp8 CLIP is a “Blockbuster Director,” creating more extravagant, complex, and elaborate character designs.
- The bf16 CLIP is an “Arthouse Director,” focusing on a more classic, emotionally resonant, and singular portrait.
Final Verdict
Qwen-Image is a monumental achievement in AI image generation. While it can be temperamental, once you understand its architecture and have the right protocol, it becomes a world-class engine for creating breathtakingly detailed and conceptually coherent worlds. It may not replace FLUX as my go-to for raw human photorealism, but as a master ‘Set Designer’ and ‘World Builder,’ it has more than earned a permanent place in my toolkit.
You can download the checkpoints, Clip and VAE on Huggingface
If you like my work, consider to sign up on my weekly newsletter and get all important news directly in your inbox!
And don’t forget to check out my Patreon, where you can find exclusive content.
