Uppdated 2023-10-28
The development of AI is progressing at a stunning pace, and in a recent post I described an easier and more user-friendly way to install AI for image creation.
Minimum Requirements To Install Stable Diffusion
As I have written before, your computer needs to be equipped with certain hardware to be able to run Stable Diffusion. It is possible to install without having the required computer capacity, but you will get error messages when you try to generate images. The hardware requirements are as follows:
- Graphics card (preferable Nvidia RTX) that has at least 6 GB VRAM
- A hard drive with at least 10 GB available space
Installation Of Stable Diffusion For Windows
If your computer meets the hardware requirements (which may change over time), you can follow this guide to install Stable Diffusion on your computer.
Install Git
The first thing you need to do is install Git on your computer, if you don’t already have it installed of course. The easiest way to do this is to download Git from their website, select the latest version. Once you have downloaded the installation file, double-click on it to begin the installation.
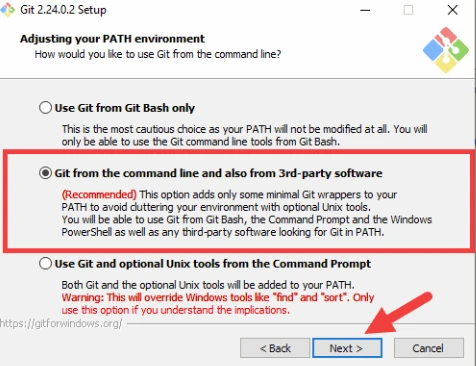
During the installation, you will be presented with various choices. Do not change any of the default options (except possibly where you want to install the program). It is especially important not to change the setting when you are asked how you want to use Git from the command line. Make sure the choice is set to “Git From The Command Line And Also From 3rd-Party Software.” (see image).
Install Miniconda
Miniconda is a free, miniature installation of Anaconda Distribution that includes only conda, Python, the packages they both depend on, and a small number of other useful packages.
For our purposes, it’s enough to know that installing Miniconda, also installs the Python libraries necessary for Stable Diffusion.
Download the latest version of Miniconda from their website.
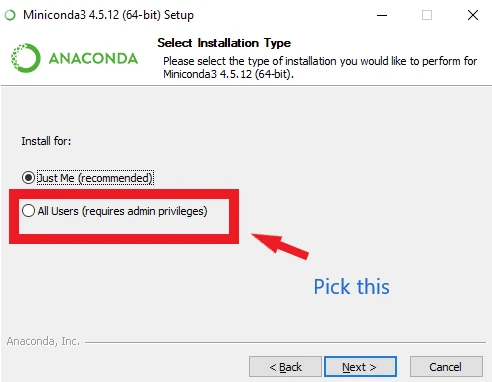
Once you have downloaded the installation file, double-click to begin the installation. It is very important to choose to install for all users.
Once the installation is finished, you might need to reboot your computer,
Download Stable Diffusion From Huggingface
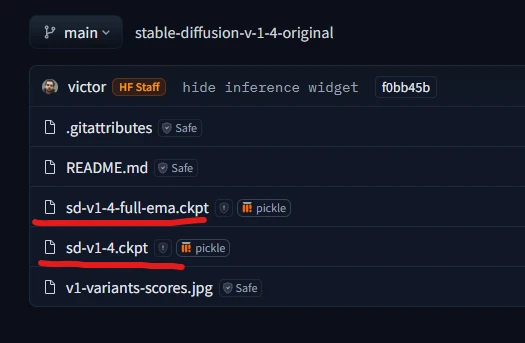
In this step you will download the AI model itself. First you need to download the latest checkpoint file, which you can find here:
Stable Diffusion v 1.4 full ema (7.7 GB)
Stable Diffusion v 1.4 original (4.27 GB)
The larger file might yield slightly better result, but pick whichever you want. You only need to dowload one of them
Preparing for Stable Diffusion
Next you have to prepare the folders where the different files will be placed, and it’s important that the structure of folders and files are correct.
Open your newly installed Miniconda. If you are having trouble finding it, search for it in windows search function (click your windows button + s) and type in conda.
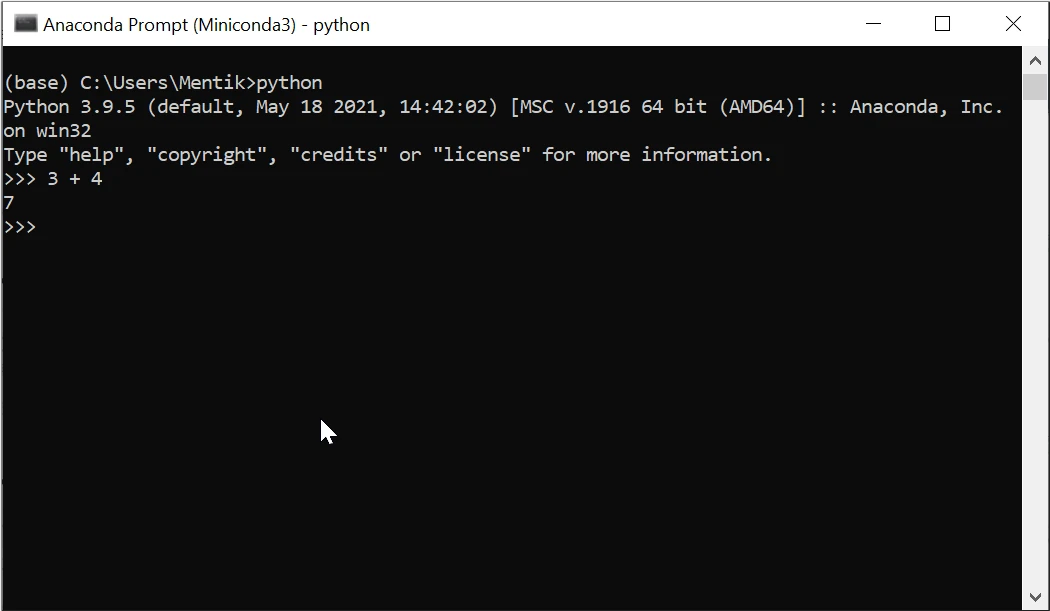
When you open Miniconda a command window, similar to windows command prompt, will open up. Assuming you are installing Stable Diffusion on your system disk, type the following in your Miniconda window.
git clone https://github.com/CompVis/stable-diffusionThis will clone the Stable Diffusion repository from Github, and create a folder named stable-diffusion. To move into this new folder type the following in your Miniconda window:
cd stable-diffusionIf it looks like the redmarked text in the image below, you are in the right folder.
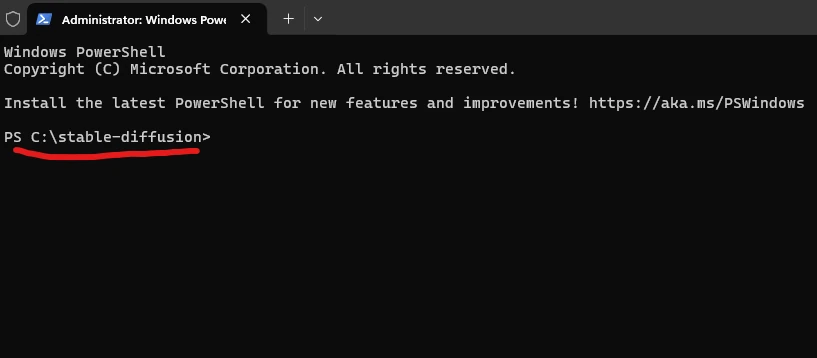
Your next step is to create an enviroment, which is like a system inside your system. This is done to protect your main system in case something goes wrong, or to keep separate version of, for example Python, on the same computer. To create an enviroment type the following in your Miniconda window:
conda env create -f environment.yaml Enter
conda activate ldm Enter
mkdir models\ldm\stable-diffusion-v1 Enter
In the above code, when it says Enter it means to click Enter on your keyboard (not to type out the word Enter).
The above code will start an installation process to make sure you have the right libraries and dependencies installed. This process can take some time, and it is very important that you don’t interrupt it.
Do NOT interrupt the process – you will notice when its all done.
When the process of installing everything is done, you have to locate the checkpoint that you downloaded earlier (sd-v1-4.ckpt or sd-v1-4-full-ema.ckpt). You now have to move the downloaded model (whichever you choose to download earlier) to the folder in the location:
C:\stable-diffusion\models\ldm\stable-diffusion-v1”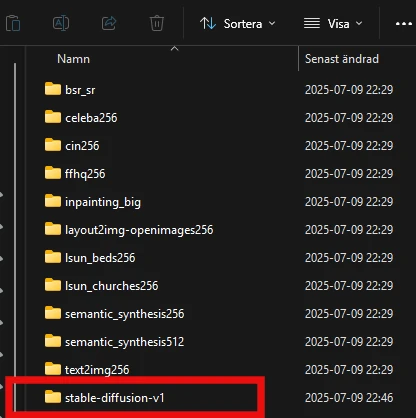
Once you have moved the sd-v1-4.ckpt or sd-v1-4-full-ema.ckpt to the folder marked in red above, you should change the name of the file so it’s name is model.ckpt. This is easiest done by clicking on the file once and then press F2, which will let you change the name.
Use Stable Diffusion
Open your Miniconda window and type:
conda activate ldm EnterType of copy and paste the following text in your Miniconda window:
cd C:\stable-diffusion\Generate Images
To create an image you will now have to run a python script named txt2img.py, which will create an image with the dimension 512×512 pixels.
Use the code below to see if it’s working:
python scripts/txt2img.py --prompt "a close-up portrait of a cat by pablo picasso, vivid, abstract art, colorful, vibrant" --plms --n_iter 5 --n_samples 1This process takes different amounts of time depending on how powerful your computer is and what settings you use.
When the process is complete, you should (if everything went well) find 5 cat pictures in the style of “Picasso” in the folder located here –> “C:\stable-diffusion\outputs\txt2img-samples\samples”.
If everything has gone well, you will find images similar to this one in your samples folder.

From now on you can generate images of anything you want by using the code below, just switch out the part that says YOUR, DESCRIPTIONS, GO, HERE for your own prompt.
python scripts/txt2img.py --prompt "YOUR, DESCRIPTIONS, GO, HERE" --plms --n_iter 5 --n_samples 1Stay in the loop! Sign up for my newsletter and get AI news, tips and tricks stright to your inbox!
