Outpaint is not much different from inpaint (which I wrote about here) and can be of use when you want to enlarge an image or add some background that you think is missing. I don’t use outpaint myself very often, so I’m no expert by any means. But I will try to show you the basics and how it can be used.
First we will need an image as a base for the outpainting, you can use an existing image or generate a new one. For this post I will just genereate a competely new image.
Checkpoint: Realistic Stockphoto 2.0
Sampling method: Euler a
Steps: 35
Hires fix: 4xNMKDSuperscale
Denoise: 0.7
Upscale: x1,5
Size: 896×1152 px
Restore face: Codeformer
Lora: Zilaria
Prompt:
Masterpiece, best quality, sharp focus. Full full body shot from above of Zilaria against a simple background <lora:Zilaria:1.1>

Outpainting
For the outpainting process itself, I prefer to use Fooocus as it’s so much simpler to use.
Once you’ve opened Fooocus tic the boxes for Input image and Advanced and make sure to use the same LoRa (if any) as you did when you created the base image.

Then you upload (or drag and drop) the image you are going to outpaint.

Use the same prompt as you did when you generated the base image. Comparing the base image and the newly outpainted image will show something like this.


Now lets move the outpainted image and make it the base image for the next outpaint, and outpaint that image to the right side.

Now let’s compare the previous image with the new outpainted image. At this point you might ask yourself why I’m not doing anythign about the background. The reason I pick a simple background is because it’s easier to outpaint, and because I plan to completely remove and replace the background later on anyway.


Let’s repeate the above steps for the left side and the top as well.

At this point my image has the size 2271×2919 px and I’m getting close to the limit of what my graphic card can handle. If I wish to outpaint further, scaling down the picture might be a good idea.
The image below has been downscaled to half its size, and then outpainted again to left, top and right. The size of the image is now 2338×2308 px.

Control background
This next step can be done in Automatic1111 and Forge with the use of the Remove background extension.
In Automatic1111 or Forge, go to the Extras tab, upload your image and activate Remove background. The settings below should generate the image below.

The above image you can pretty much do whatever you want with. If you only want to change the background, you don’t have to use Remove background first, but follow the steps below.
For this next step I was going to show you how to use Inpaint background, but for some reason it kept glitching and giving really bad results.
Such as these:


Instead we’ll take the image back to Fooocus and use the inpaint there. Masking the image isn’t really that much work, unless you have really small details.

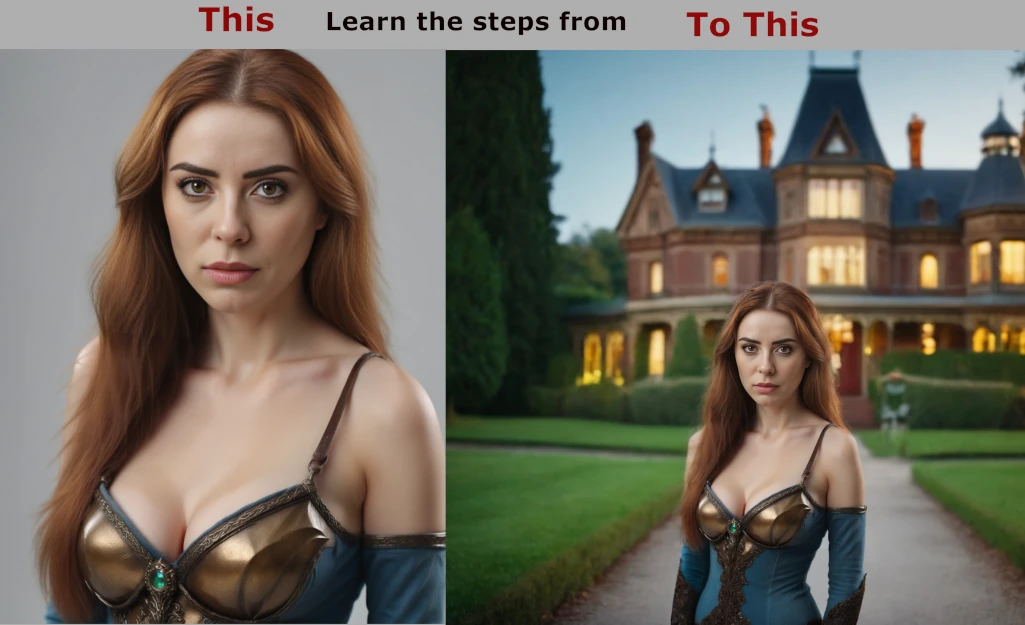
With the image masked, just put whatever you want for background in your prompt. For example:
Masterpiece, best quality, sharp focus. A beautiful detailed victorian house with a big garden. Intricate background details. Depth of field


Be sure to check out my guide on making a LoRa, image control with inpaint and how to control the perspective with camera angles as well.